
Amigurumi Giraffe free crochet pattern

Use this amigurumi giraffe free crochet pattern to crochet your own Amigurumi giraffe. Giraffes are one of the cutest animals to make with their tiny ears and horns. Did you know giraffe horns are called Ossicones. I didn’t until recently. The suspender shorts pattern HERE can be used with this giraffe too. Read on until the end of this post to see for yourself. 🙂 You can make this using sport/dk weight yarn and this giraffe would make a cute keychain or bag charm. It makes a great toy for kids, just make sure you embroider the eyes as plastic eyes can be risky with babies as they might swallow them.
If you liked this amigurumi giraffe free crochet pattern, check out my other free amigurumi patterns:

Supplies:
- Small amount of Red Heart Comfort in Bright Yellow, Heart Super saver in Brown, White yarn for mouth
- Small amount of black yarn(Red Heart Super Saver in Black) for embroidering the eyes/Plastic safety eyes
- 4mm crochet hook
- 3mm crochet hook for the ears and horns
- Large eye tapestry needle and scissors
- Stuffing
Abbreviations:
- Ch – chain
- MC – Magic Circle
- Sl st – slip stitch
- sc – single crochet
- [Number] – Stitch count at the end of the round
Pattern Notes:
- This project is made with worsted weight yarn, however there is no gauge required, so your can use any yarn with a suitable hook.
- Sew the head to the body twice, this gives it more stability.
- A well stuff body and head, sickle stitching head to body help prevent the dreadful wobbly head.
- Spots on the body are made using duplicate stitches.
- WARNING: Embroider the eyes if using it as a toy for babies. French knots work great. Plastic safely eyes can be a choking hazard.
Tips before you start:
- Amigurumi always looks better when the stitches are tighter because it prevents the stuffing from poking out. Use 1 size smaller hook than your yarn calls for.
- The look of the Amigurumi finished object depends a lot on how you stuff it, so don’t be impatient and stuff too much in one go. Do it in bits.
- Always pin the body parts together before you start sewing because this helps in keeping them in the right place and visualize before sewing. Be it the limbs or the eyes, mouth, ears, antlers, horns, wings etc. Doesn’t matter even if they are really small parts, pinning them helps. I say this from personal experience as they always turn out better looking when you do this. 🙂
Pattern:
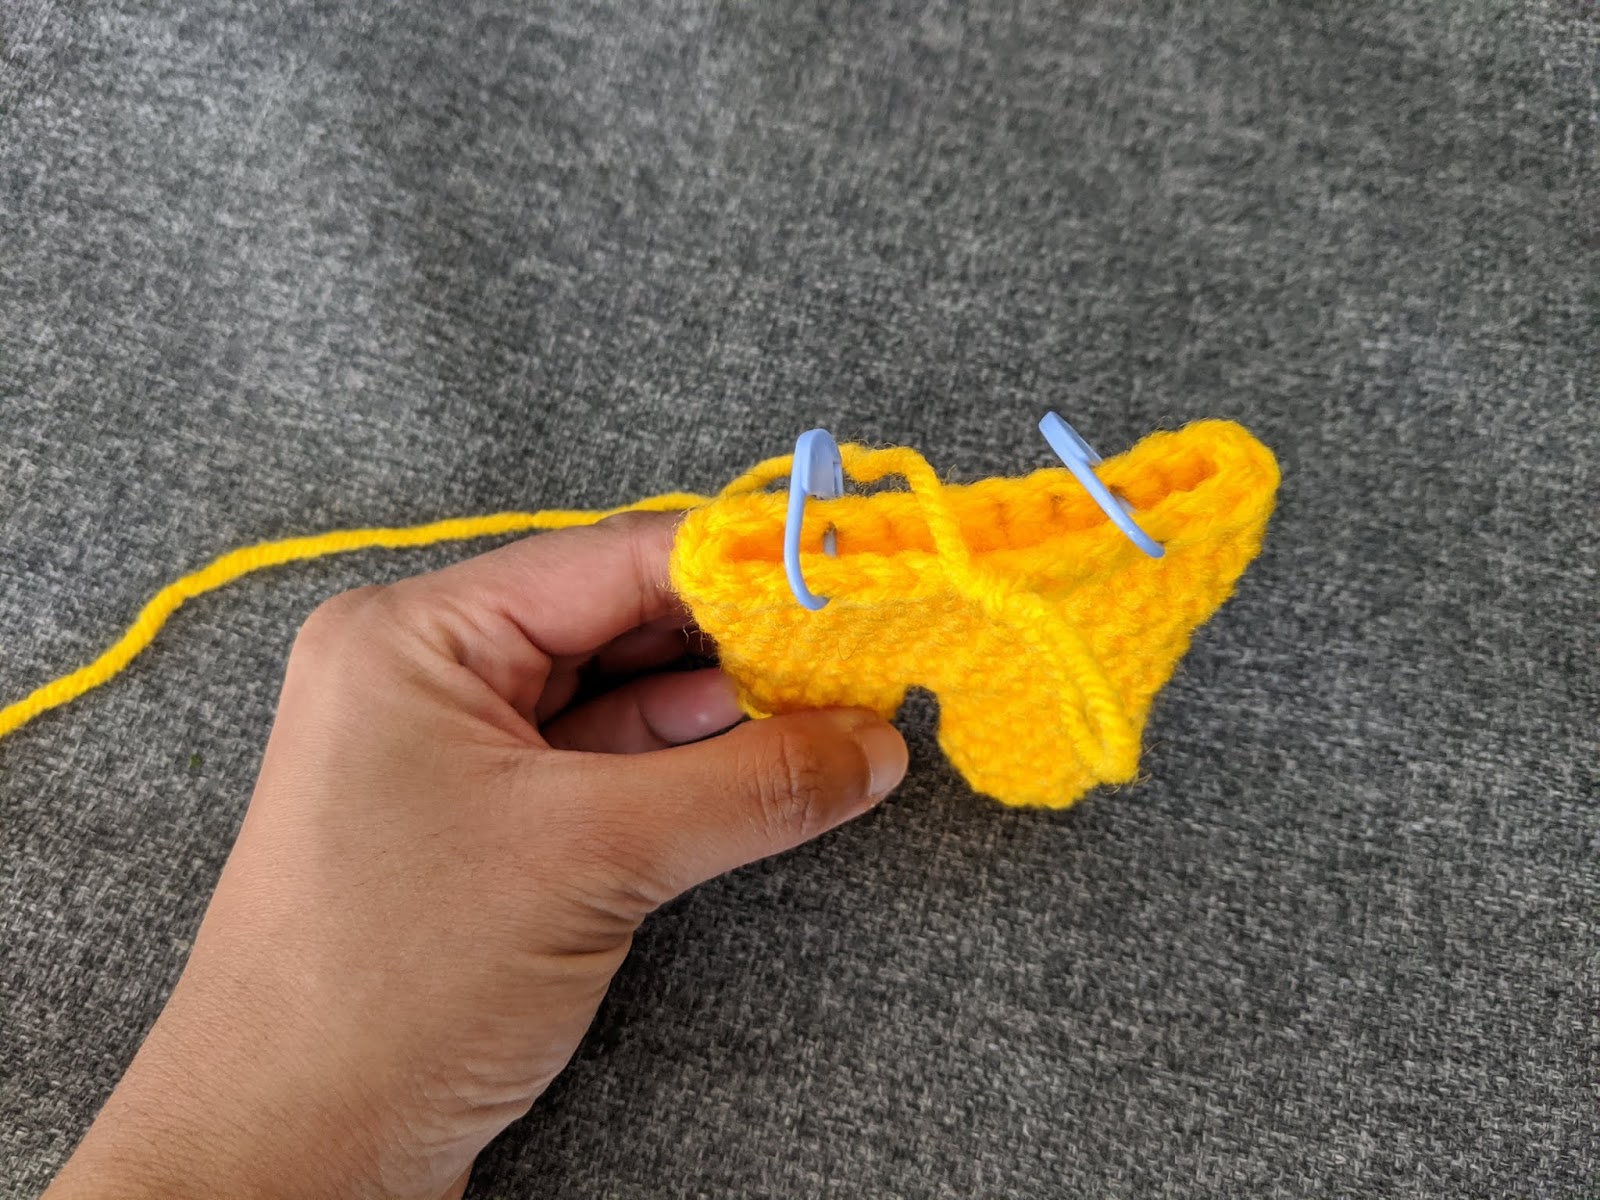
Legs (Make 2)
MC
R1: 6sc into the circle
R2: *(1sc in the next stitch, 2sc in next stitch); rep from * 3 times [9]
R3-5: 1sc in each stitch round [9]
Don’t cut yarn after making the second leg.
Working in rounds around both legs:
R6: Ch2, join the other leg using 1 sc (mark this stitch, this is the new beginning of our round), 8sc around leg we just joined, 1 sc into next 2 chains, 1sc in the next 9 stitches around the leg , 1 sc in the next 2 chains. [22]
Start stuffing the legs at this point.
Body:
Now we will be working in continuous rounds around both legs to form the body.
R7: 1sc in the next 9 stitches, 2sc in the next 2 stitches, 1 sc in the next 9 stitches, 2sc in the next 2 stitches [26]
R8-11: 1sc in each stitch round [26] – 4 rounds
R12: 1sc in next stitch, *(1sc in next 4 stitches, sc2tog); rep 4 times, 1sc in next stitch [22]
R13: 1sc in next stitch, *(1sc in next 3 stitches, sc2tog); rep 4 times, 1sc in next stitch [18]
R14: 1sc in next stitch, *(1sc in next 2 stitches, sc2tog); rep 4 times, 1sc in next stitch [14]
R15: 1sc in next stitch, *(1sc in next stitch, sc2tog); rep 4 times, 1sc in next stitch [10]
R16-18: 1sc in each stitch round [10] – 3 rounds
Fasten off and leave a long tail to sew the head.

Ears (Make 2)
Red Heart Comfort is 4 ply yarn, I split the yarn strands and used only 2 strands for the ears and 3.5 mm hook as I needed them smaller and 4 ply makes them really thick. This makes the ears the size I wanted. You don’t need to do this if you’re using sport weight yarn.
Yellow yarn (2 strands)
MC
R1: 6sc into the circle [6]
R2: 6sc into the circle [6]
R3: *(1sc, 2sc in next stitch); rep from * 3 times [9]
R4: *(1sc in the next 2 stitches 2sc in next stitch); rep from * 3 times [12]
R5: 1sc in each stitch round [12]
R6: *(1sc in the next 2 stitches, sc2tog in next stitch); rep from * 3 times [9]
Fasten off with a long tail to sew. Do not stuff them. Sew the 2 edges of R7 together to give the ears a folded look.

Horns (Make 2)
Brown yarn
R1: 6sc into the circle [6]
R2: *(1sc in the next stitch, 2sc in next stitch); rep from * 3 times [9]
In yellow, 1 smaller size hook
R3-8: 1sc in each stitch round [9]
Fasten off with a long tail to sew. Stuff them lightly.
Mouth:
MC
R1: 6sc into the circle [6]
R2: *(1sc in the next stitch, 2sc in next stitch); rep from * 3 times [9]
Lightly stuff it when sewing it to the face as it looks better. Pin it to the face first to decide where to put it, because this makes it easier to visualize and fix it if you’re not happy.

Head:
MC
R1: 6sc into the circle [6]
R2: 2sc in each stitch around [12]
R3: *(1sc, 2sc in next stitch); rep from * 6 times [18]
R4: *(1sc in the next 2 stitches, 2sc in next stitch); rep from * 6 times [24]
R5: *(1sc, in the next 3 stitches, 2sc in next stitch); rep from * 6 times [30]
R6-8: 1sc in each stitch round [30]
R9: *(1sc in the next 3 stitches, sc2tog in next stitch); rep from * 6 times [24]
R10: *(1sc in the next 2 stitches, sc2tog in next stitch); rep from * 6 times [18]
R11: *(1sc in the next stitch, sc2tog in next stitch); rep from * 6 times [12]
R12: *(sc2tog in next stitch); rep from * 6 times [6]
Fasten off with a long tail to sew but do not close the hole shut as having open stitches makes it easier to sew the head to the body.
Embroider the eyes if using it a toy for babies. French knots work great. Plastic safely eyes can be a choking hazard.

Arms:
MC
R1: 6sc into the circle [6]
R2: 1 sc in each stitch around [6]
Fasten off with a long tail to sew. Sew them on R14 of the body.
Finishing:
I have tried French Knots and duplicate stitches for the spots on the body and they both look great! Use brown yarn and make duplicate stitches or French knots here and there. If using French Knots, I’d recommend using 2 strands of yarn because they make the spots looks dense. HERE is a video on how I make french knots for the spots on the giraffe body.


